Let’s talk about hinges…
October 2, 2024
A short discussion by Peter Laidler, ably assisted over a couple of months by Nick Rogers and a couple of local classic car fiends.
Knackered or worn out external door hinges have been the bane of many restorers in the past 25 years, since the last of the external mini door hinges were available from Unipart. First a few bits of info that you should know; everyone knows that there are 4 hinges per set, making a total of 8 parts are all different.
- Top right, (odd number always to the front) 1 and 2
- Bottom right 3 and 4
- Top left 5 and 6
- Bottom left 7 and 8.
These numbers are stamped quite clearly on the rear surfaces.
The FRONT parts are retained to the body by two ¼” UNF studs set into the hinge, spring washers and nuts. I say that you could safely replace the spring washers with Nylock nuts and round washers that will slightly spread the locking load.
The REAR, door retainers are a similar stud and spring washer. Likewise, you could elect to use a nyloc nut and a large, say, ¾” outer diameter washer. The front retainer is a shallow Phillips headed bolt.
The need for new hinges is really down to what’s wrong with the OLD ones. There’s a couple of real problems that spring to mind. Sheared-off studs, stripped threads, totally jammed solid hinge axis pins and…… Er….., that’s about it really!
But there’s another even bigger problem that nobody seems to notice. That relates to the FRONT, shorter section, that is bolted through the A panel. These short lengths are always odd numbers I’m going to call these pieces, the FEMALE parts. The problem here is that when the heavy door is open, it hangs OUTWARDS AND DOWNWARDS from these female odd-numbered pieces and the weight on the MALE part of the hinge tends to lever open up the snug fitting between the male and female parts – if you get my drift!
As a result of the widening gap between the legs of the female part, is that by default, the door is immediately loose. The quick fix is to take the hinge axis pins out, and replace them. But you’ll soon find that while the new pins might be a perfect fit in the OLD bushes. So the pins get replaced, the bushes don’t. But the door still feels as slack almost as it did before.
Don’t forget. Axis pins are always removed from bottom to top. The ring serrations around the top fit into the top part of the hinge
You just can’t win can you? Well, you CAN but you’ve got to be a bit brutal and accept that once you can noticeably feel the wear, your hinge set has got to come off. They’ve got to come off in order to replace them with a new old stock set or to fix the old originals PROPERLY. You could fit a repro set but just be warned that some of these cast alloy repro sets have earned themselves a piss-poor reputation. You might just as well follow our examples shown here
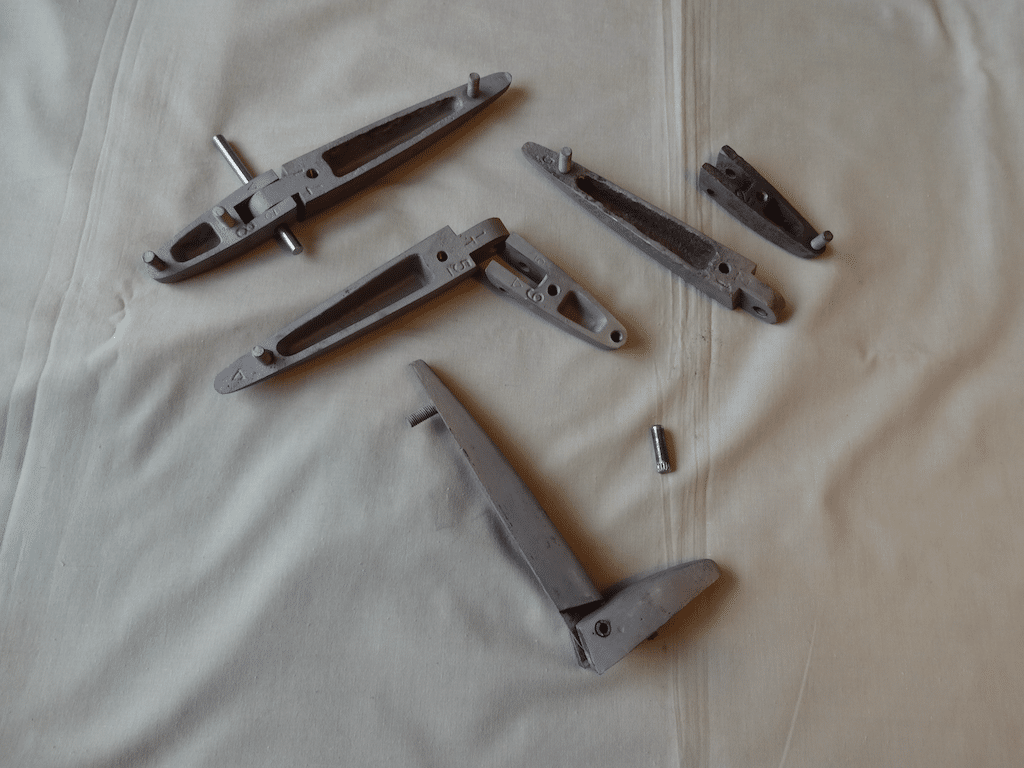
Picture 1: Seemingly absolutely knackered hinge set. But amazingly, reworked to perfect condition
Picture 2: As well as a knackered axis pin hole, bodged with a roll-pin, notice how much the legs of the female part have spread. These are off a well used car and time has taken its toll
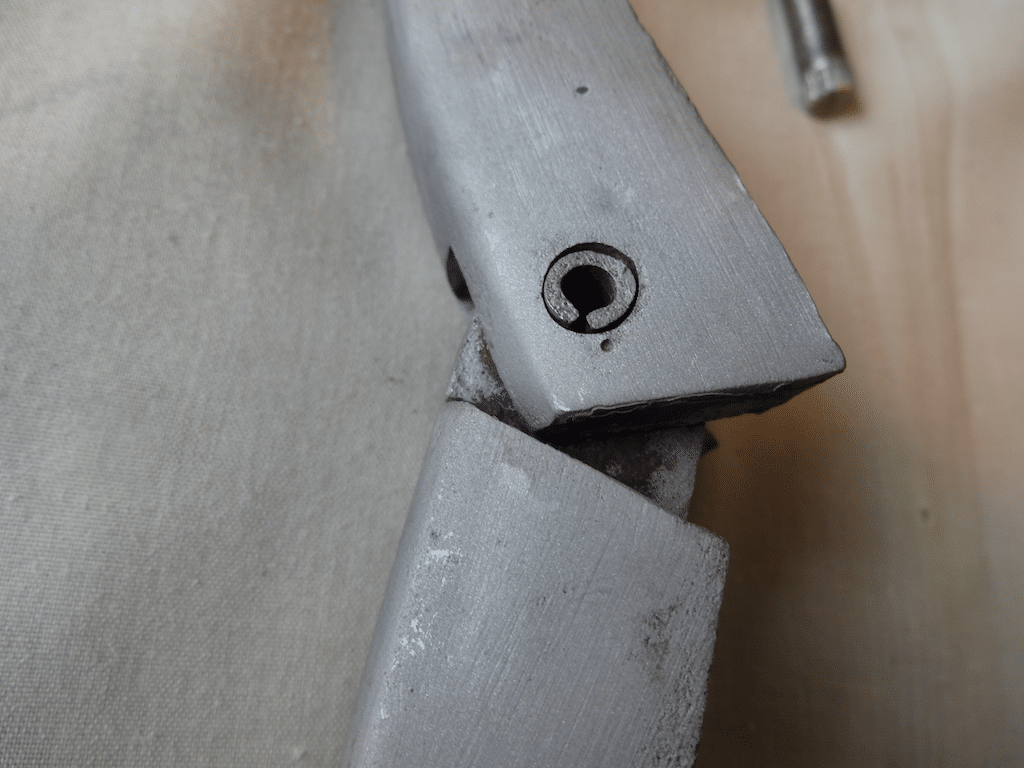
Sadly this hinge was the only one that we couldn’t truly save as the axis pin hole through the front section had been enlarged. We persevered with the rest of it to show how it could be done…..
Picture 2-A: Same set as 2. The whole of the bushed area was elongated beyond use. Note that now it has been bored out and re-bushed with an oversize bush.
But be warned, the old bushed hole must be overbored exactly in line with the original vertical alignment of the old bush and pin. The sheared stud was also drilled out and re-tapped
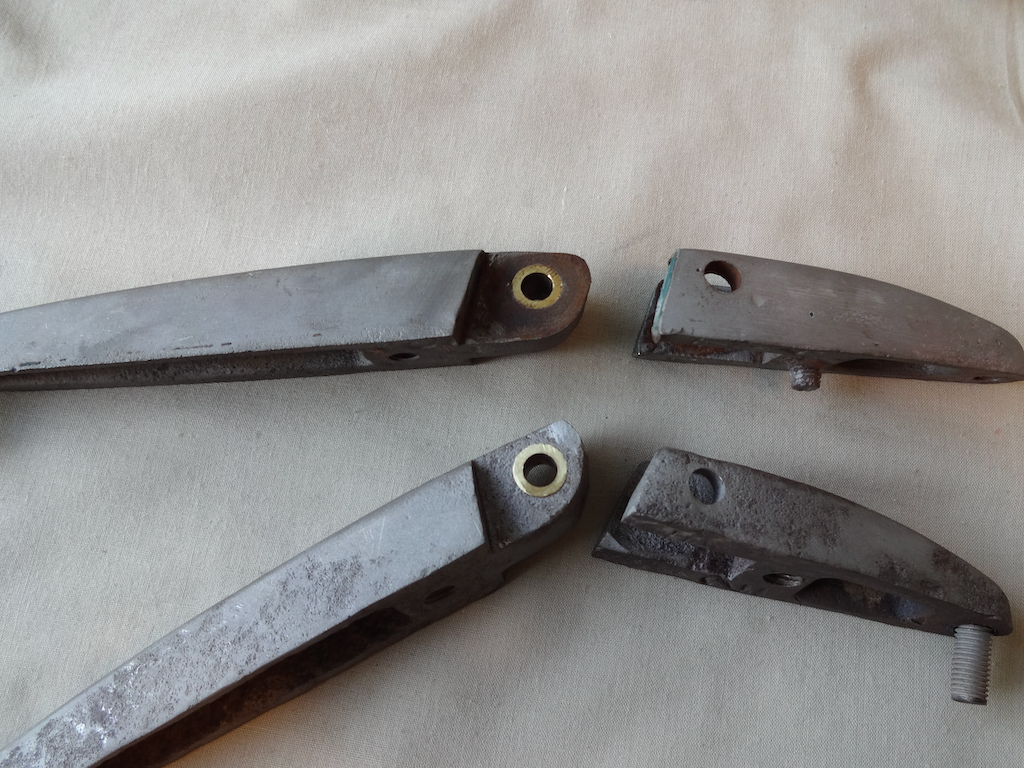
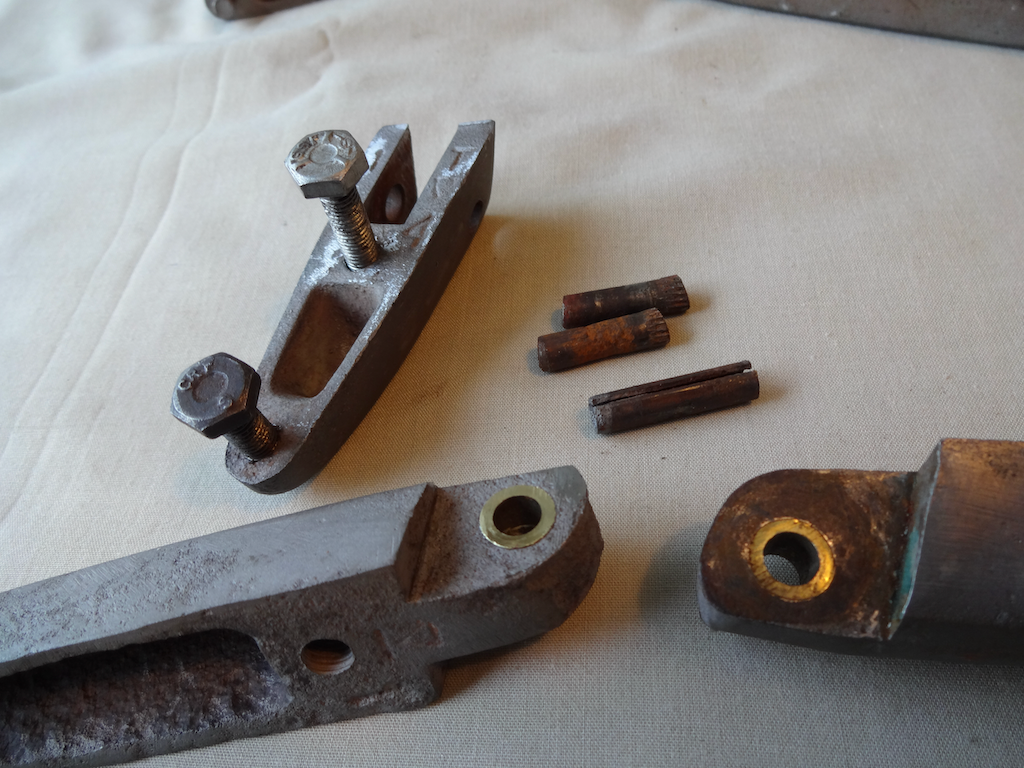
Picture 3: We speak about this…. Notice carefully how the hinge mating surface is at 107/73 degrees to the horizontal and vertical alignment of the hinge pin and screws. Be careful if you need to re-drill and tap…..
Picture 4. Oversize bushes fitted to previously worn ovalised axis holes
Picture 5. This is the challenge we were up against
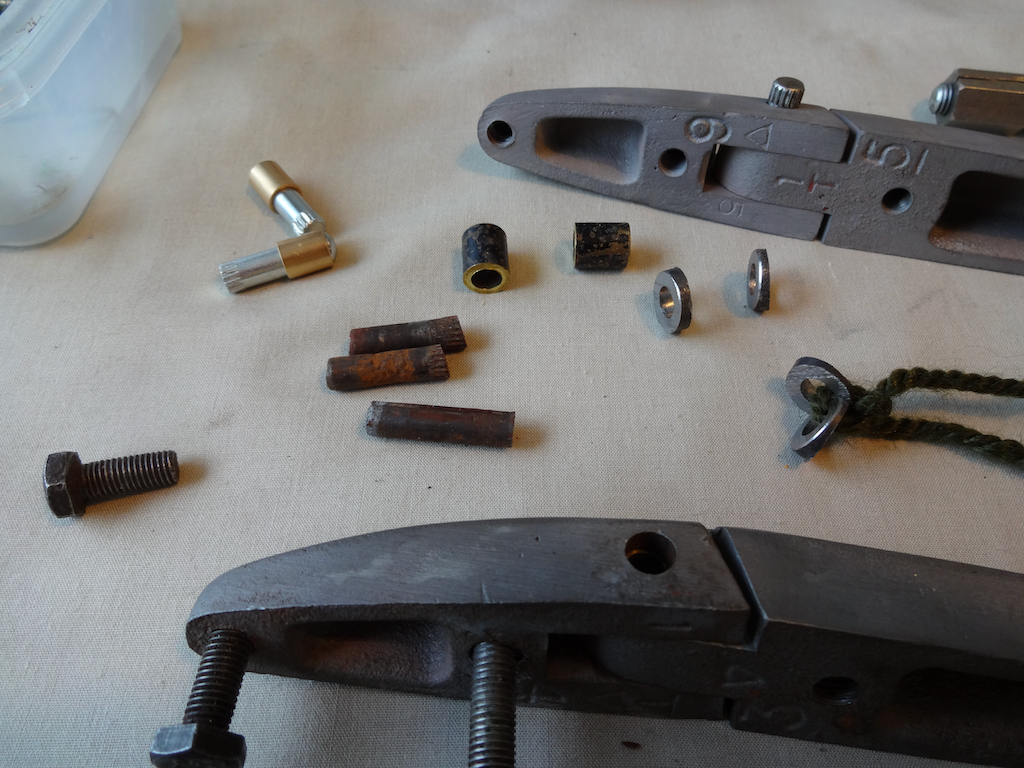
Picture 6: An assortment of the odds and sods…… A couple of new pins and bushes, a couple of sets of stainless angled washers for the top hinges and a pair of the new slightly oversize bushes
So JUST what can I do? Good question. The first thing to do is take them apart and wire brush and clean them down and have a good look. Sheared off bolts and stripped threads will cause you a few heartaches. Not because they’re sheared or stripped but because on the TOP left and right hinge set, the bolts are inserted at an angle of 107 degrees from the horizontal (or 73 degrees from the vertical…). This is due to a bit of simple mechanics. In short, the hinges are slightly angled to take into account of the curvature of the top of the door. But the axis pins MUST accurately align with each other AND the hinges must bolt in squarely too. That’s why the rear nut and front screw sit on a slightly angled spacers! Part number 14A7387.
Just remember this 107 degree angle if you are re-drilling the bolt holes for any reason
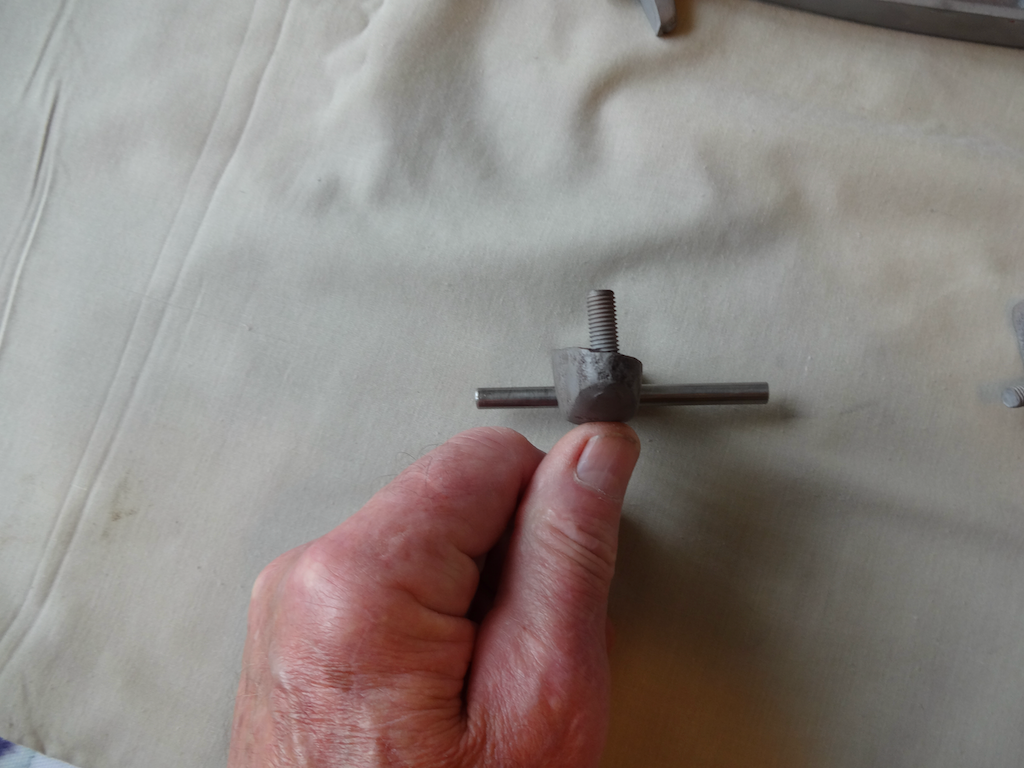
Let’s talk about these little angled spacers that appear on the two TOP hinges. Some rebuilders seem to leave them out! They’re there for a good reason, They’re also made from crap sintered alloy that splits across the narrow part and once split, they’re useless so bin them! You can’t tighten them up!!! But they’re important as they take into account the slight curvature of the door, the studs and the square-on alignment of the hinge axis pins. I have made my own in the past from a short length of stainless, bored through ¼” and cut across at the necessary angle. No more splits or rust!!!!!
The awkward shapes make holding the hinges to drill out any sheared-off threaded shaft difficult because while THE ONLY CONSTANT DATUM that we have to work on is the fact that, regardless of anything else, is that the hinge axis pin alignment on the top and bottom hinges are exactly VERTICAL. (See photographs)
As a result of that, it goes without saying that regardless of the angle of the door facing side of the hinge, the THREAD IS AT 90 degrees or right angles to the axis pin hole.
While the hinges are stripped down it might be a good idea to remove the 3 studs per set and tap the threaded holes clear. If you want to use new studs, they’re readily available in mild steel or stainless too.
Sadly, on one of our hinges, the rearmost thread had stripped, beyond help. Fortunately, the stripped hole was almost the tapping size hole for the next size UNF tap. We simply drilled through, tapped the hole oversize and inserted a stepped stud, oversize in the hinge and ¼” UNF in the door side..
You can really use whatever tap oversize you have handy, even metric because after we’d silver soldered over the break-through and cleaned it up, there was nothing to see.
While you’re down there, as the actress said to the Bishop, let’s mention the gaskets… Made from water/moisture absorbing fibre. Words fail me. In fact they failed me even more on my brand new Cooper where the gasket area had started to rust within a month or so due in no small part to the fact that the area under the hinge gaskets was un-primed and painted! And the fiasco continued until Victoria Garage at Swindon totally told me that if I stripped the door internal trim, they’d re-prime and paint the doors completely, on the BL warranty!
The best thing you can do is to forget about the fibre water absorbing gaskets and make yourself a set from a similar thickness plastic material. My car, being white, I used a washing up liquid bottle then and now.
As for the spread legs of the front parts this was a simple fix as they were gently squeezed in the vice jaws until they were nice exact fit on the male portion of the rear part of the hinge
Not many pictures to show because mini door hinges isn’t really a subject that lends itself to pictures. It’s a bit of a weekend job per set……, when it’s raining outside and you need to keep your restoration moving slowly along.. Better still, once you have rebuilt them properly, they’ll last another 50 years
If anyone wants a set of the oversize bushes, they’re .375” o/d and a good squeeze fit. Send me a tenner for 4, cut to length and I’ll include a jiffy bag and post!
Peter Laidler can be contacted through the Mk1-Forum – user name ‘Peter Laidler’
“The best thing you can do is to forget about the fibre water absorbing gaskets and make yourself a set from a similar thickness plastic material. My car, being white, I used a washing up liquid bottle then and now. ” I think Peter you are of an age when sticky back plastic and old washing up bottles were modified.